Tuesday 24 December 2013

Festive Greetings!

Over at the Counterfeit Kit Challenge Blog today* I've shared a couple of sketches for scrapping some of the many photos we'll be snapping this festive season.  If mini-books are more your thing then perhaps you'd like to give a home-made word book a try ...


I made that one back in 2008 as a present for a friend's photos of her first grandson's first Christmas. I made another one a couple of years later to fill with quotes and festive photos as a family gift.  It had extra pages between the letters to allow for extra snapshots.


While I was making it I took step-by-step photos and put together a set of instructions - originally published in 2010 on UKScrappers, but you can download them directly here and see some more inside pages here.  The instructions are for the word "NOËL" but they are easy to adapt to "XMAS", "2013" or indeed any other word, long or short!  Let me know if you have a go!

Merry Christmas Everyone!!

* A slight scheduling faux pax on my part means that this post went live 2 days early - so that CKCB post isn't there until Christmas Eve! Sorry!

Saturday 14 December 2013

Tagxedo New Year

Jimjams - Tagxedo Happy New Year cards Today over at the Counterfeit Kit Challenge Blog I have a post about making VERY quick Tagxedo New Year's cards

If you like Tagxedo as much as I do you may want to play around with it to produce something a little more complicated.

I searched for multi-lingual versions of "Happy New Year" and plugged them into Tagxedo to produce this multi-lingual card:

Jimjams - Tagxedo Happy New Year card

Ring the changes with a different colour-way and layout:

Jimjams - Tagxedo Happy New Year cards

Or change the shape:

Jimjams - Tagxedo Happy New Year cards 

I used the following words for all three cards:
Gelukkig~Nieuwjaar Bonne~Année Buon~Anno
Ein~Guten~Rutsch Feliz~Ano~Novo Gott~Nytt~År
Feliz~Año~Nuevo Blwyddyn~Newydd~Dda Onnellista~Uutta~Vuotta
Mutlu~Yıllar Godt~Nyttår
Sretna~Nova~Godina Boldog~Új~Évet

Gelukkig~Nieuwjaar Bonne~Année Buon~~~Anno
Ein~Guten~~Rutsch Gott~Nytt~År
Feliz~Año~~Nuevo

Happy~~~New~Year:20:@0:#ff0000
The tilde (~) characters keeps associated words together, twice (~~) will stop them from being on separate lines, thrice {~~~) will force a line break.  The text in red is the RGB code to make the words "Happy New Year" appear in red!  The 20 forces "Happy New Year" to be the biggest phrase and the @0 apparently forces it to be horizontal (though I'm still not convinced)!

The other settings are the defaults apart from:
Respins:
Shape = Oval / Star
Theme = Pi Palette / Quiet Morning / Citrus Wasabi
Font = Euphorogenic
Orientation = H/V

Word:
Remove Common Words = No
Combine Related Words = No
Combine Identical Words = No

Layout:
Max Word Count = 50
Normalize Frequency = Yes
Hard Boundary = Yes
Allow Replication = No
You do need to respin the layouts and colours a few time to find a design you're happy with - but it doesn't take long to save, crop and print once you've found it.  Have fun!

P.S. Use this link to see all my Tagxedo card ideas 

Wednesday 4 December 2013

Just The Ticket

Jimjams - Tickets
There is Daily December Inspiration over at the Counterfeit Kit Challenge Blog at the moment and today it's my turn with a post all about embellishment clusters with tickets.

I adore the way you can include tickets in almost any embellishment cluster, adding a sentiment, a symbol, some colour or a date in a subtle way.

I've included some great links to digi & printable tickets over at the CKCB but I also wanted to include a quick & easy tutorial for making your own tickets from scratch over here.


Cut a strip of cardstock 1" (2.5cm) wide and add faint pencil lines it at 2" (5cm intervals).  Using a sewing machine with a large needle (but no thread), sew across the strip along these lines.  A needle, pokey tool, paper percer or tracing wheel will do the job too, but a sewing machine is quick!


Use a longer stitch lenth if you want to keep the ticket strip intact.  Use a shorter stitch length to make it easy to rip the tickets apart.


Using a hole punch take a semi circle out of each edge of the perforated lines.Some tickets have large holes punched half-way up the perforations as well (like the Maya Road adore ticket above).


If you want your tickets to have an inner frame then make a ¾" x 1¾" (2cm x 4.5cm) template to draw around.

Finally, have some fun decorating your tickets!

Saturday 30 November 2013

Awesome

Jimjams - Embellishment cluster
I've had an awesome day!  Brilliant company, great cake (courgette & chocolate courtesy of Lesley) and plenty of scrapping at my monthly crop.  As it was the last one before Christmas we had a Secret Santa gift exchange and extra goodies in a raffle.  A really lovely day.

As ever, my scrapping output was fairly minimal (I enjoy the chat as much as the creativity) and I only managed one complete page to share today.  That's Child No.3 in the frame earlier this summer ... a very bonny lass I'm sure you'll agree.

Jimjams - Layout - Hey! Good Looking

The page is based on November's sketch over at Sarah's cards and uses some scraps from my October counterfeit kit (fitting perfectly with a challenge over at UKS to use shades of teal and orangeon a page).  Those teal gems and swirly paperclips were in my the Christmas surprise package on my crop table today - aren't they lovely!

Sunday 24 November 2013

Thanks But No Thanks

Jimjams - Cards - Thanks for All OccasionsWelcome to the start of November's Members' Blog Hop from the Counterfeit Kit Challenge Blog.  The challenge this month, was to make a little book of thankfulness. Oh dear, I thought.  It's not that I'm not grateful for things, I am.  But I have enough (unfinished) mini-books to last a life time and I need to use my creative time usefully ... so I decided to twist the challenge slightly to my own ends.

Normally around this time of year I am busy with one of my many sisters in law, gathering gift requests and financial donations from Hubby's very large family. There are so many brothers, sisters, nephews and nieces, cousins and spouses that we found it easier to put together a huge pot of money and buy each relative ONE gift on behalf of everyone else.  Far better to get just one decent sized exactly-right present than two dozen much smaller and less perfect gifts.  Each family contributes according to their means and last year the pot was nearly £1000 divided between 34 children and adults.

However this year several families are feeling the pinch and sadly the majority have decided that they will be cutting back and not joining in with extended family giving and receiving.  The end of a very useful family tradition, leaving a big hole in the festivities :-(

Which is the perfect excuse for me to think outside the box and start making gifts instead ... starting with a set of Thank You cards for a variety of occasions:

Jimjams - Cards - Thanks for All Occasions

Using my November Counterfeit Kit along with some white card, Sizzlits Retro Metro alphabet & Decorative Accent dies I concocted a number of reasons to be grateful and printed them in Veggieburger Font.

Jimjams - Cards - Thanks for All OccasionsJimjams - Cards - Thanks for All Occasions

Hopefully this set of cards will make one of Hubby's sisters happy on Christmas Day.  Now I'm off to look at other creative things to make and package prettily for the other four lovely ladies.  Do you make gifts to give away? 

The next stop on the gratitude trail is Valerie, but if you get lost along the way, the full blog hop order is published on the Counterfeit Kit Challenge Blog today.  Happy Thanksgiving!

Thursday 14 November 2013

Secret Style Swap

Lisa recently asked the whole Master Forger team over at the Counterfeit Kit Challenge Blog to define our scrapbooking "style" by answering a questionnaire.  She mixed the style sheets up and supplied us each with the answers provided by another Master Forger.  We were then challenged to make a page in the style of our secret swap partner.  I was hoping I wouldn't be required to scrap with too much pink or florals or glitter ... and luckily I did manage to avoid all of those!

Today the Master Forgers are sharing the results of the style swaps and you may have arrived from Dawn (especially if you started on the CKCB here).

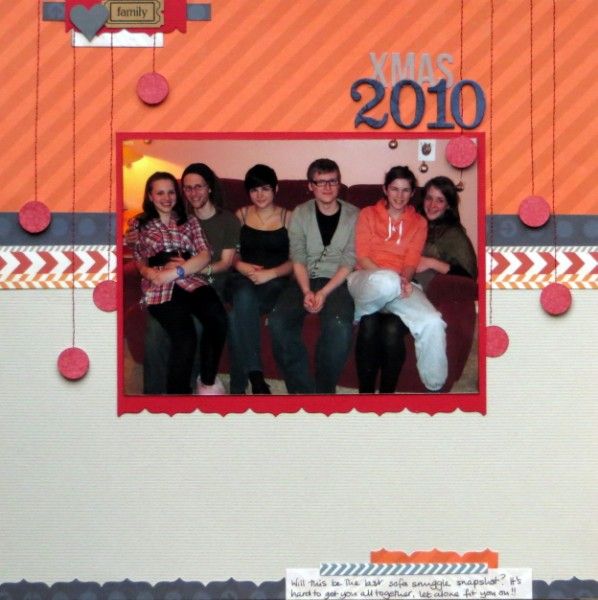
While I was waiting for my style swap partner's questionnaire I had a bash at scrapping according to my own answers:

CPH Walking Tour detail photo CPHWalkingTourdetail1400x300.jpg
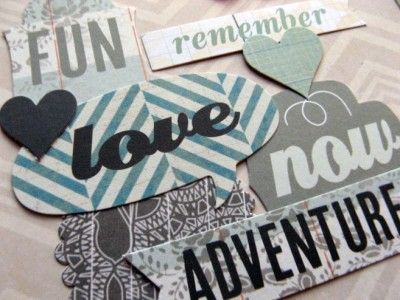
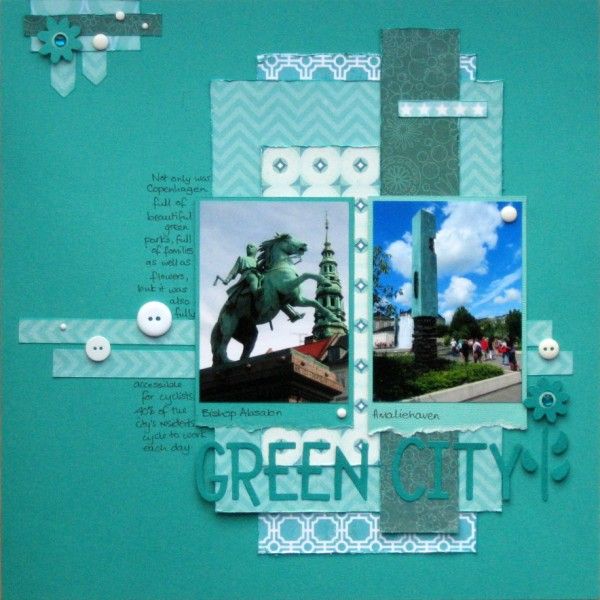
• started with a sketch
  (#6 from Scrapbook Generation's Travel Sketch Book)
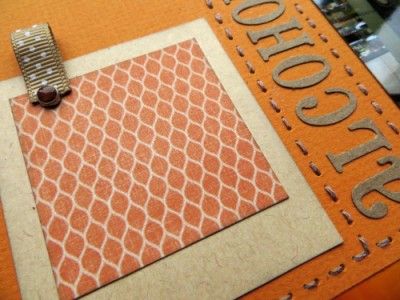
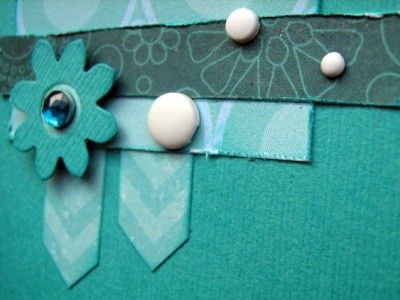
• used a colourful, cardstock background
• chose several event-themed, cropped, standard-sized prints
• stuck to straight lines and geometric patterns
• kept things clean & simple with no messy techniques
• placed elements off centre and used visual triangles
• distessed/sanded/inked/torn/stitched edges
• used classic products from a variety of collections
  (my October Counterfeit Kit)
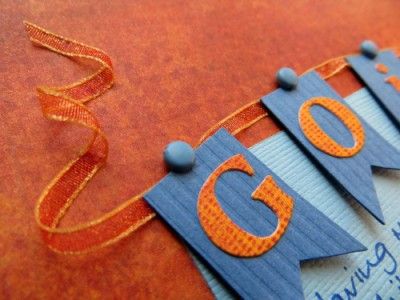
• mixed up my title letters and added handwritten journalling

Jimjams - Layout LHS - Copenhagen Walking Tour

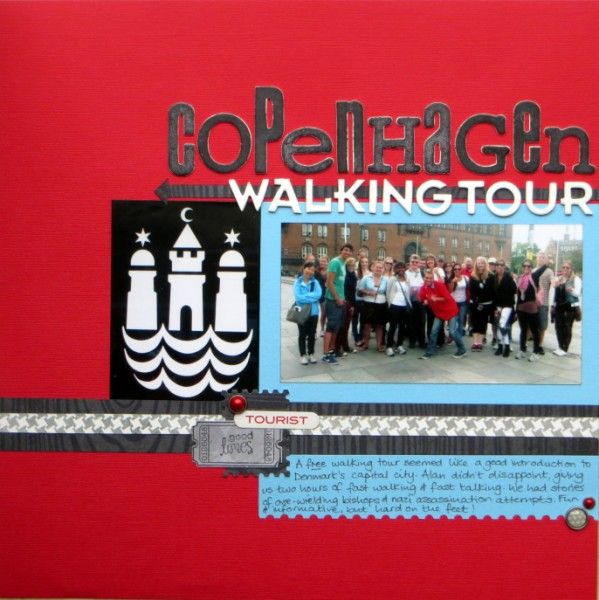
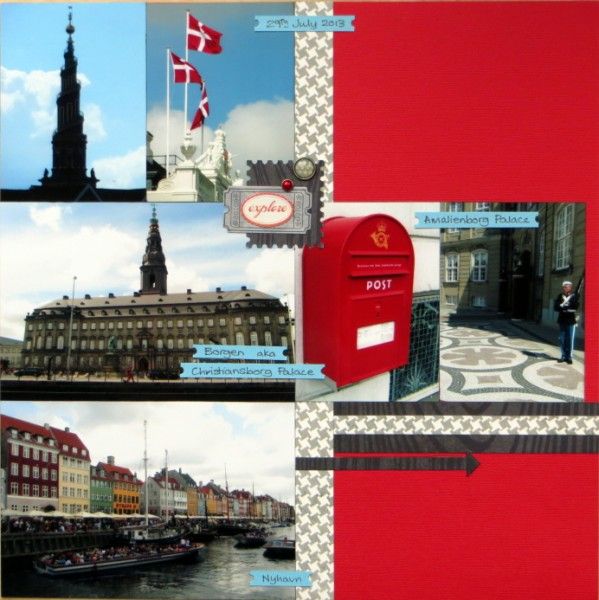
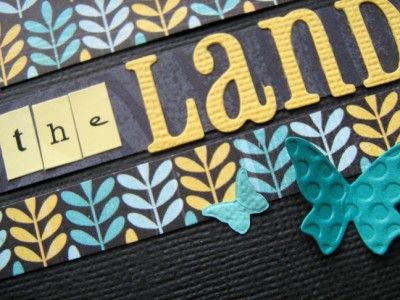
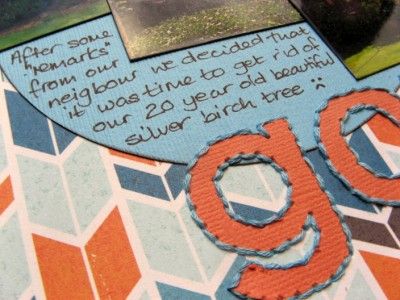
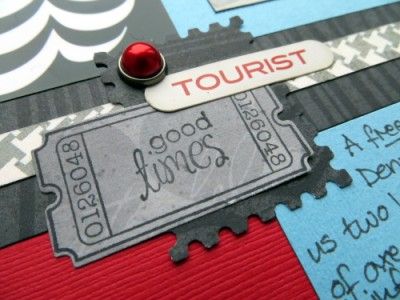
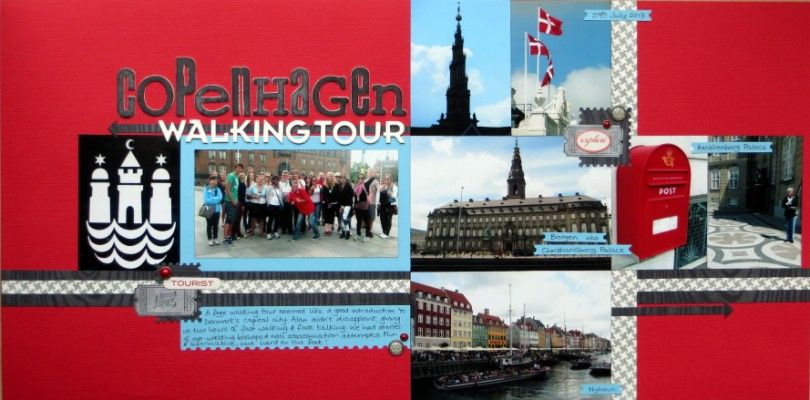
... and because I had answered that I occasionally do double pages (and that book of sketches is crammed full of brilliant ones), it seemed appropriate that there was a second page of photos from our free walking tour of Copenhagen this summer:

Jimjams - Layout RHS - Copenhagen Walking Tour

... making a double page spread that I recognise as mine, but is probably a little cleaner and simpler than most of my single pages thanks to the number of photos:

Jimjams- DLO - Copenhagen Walking Tour

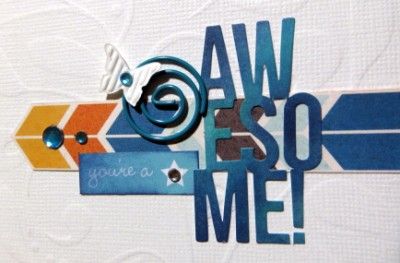
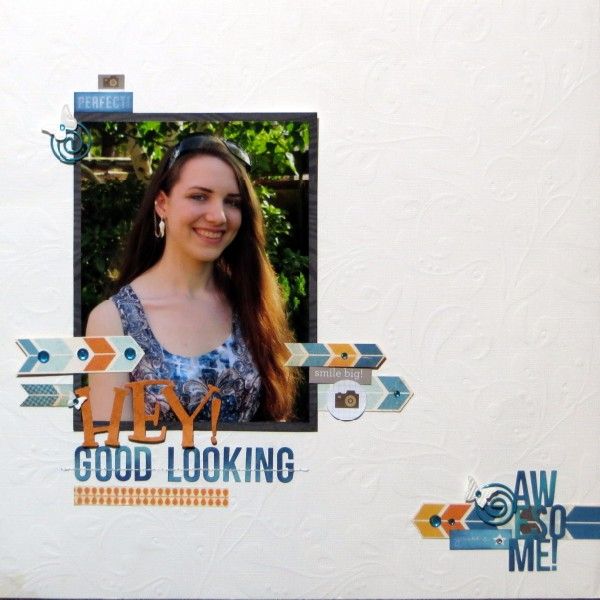
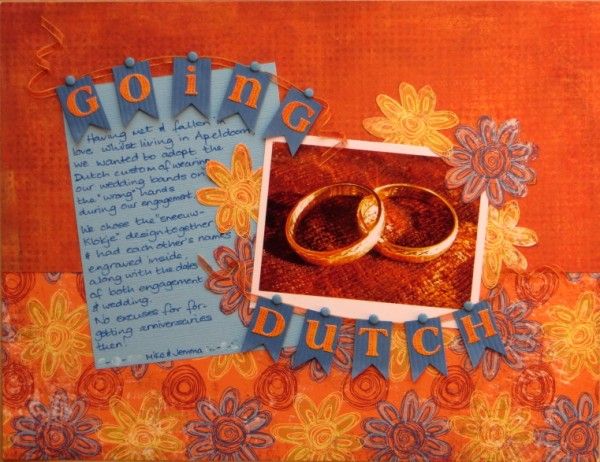
Then it was time to have a go with my style swap partner's answers:

Posh Nosh detail photo PoshNoshdetail400x300.jpg
• start from a single momentous, standard-sized photo
• use a neutral, patterned paper background
• feature clustered angles and visual triangles
• strike a balance between sticker sneeze and clean & simple
• centralise the main elements
• keep the tones muted with organic and girly patterns
• use classic products from a variety of collections
• mix up the title letters and add handwritten journalling
distress/sand/ink/tearn/stitch edges

Jimjams - layout - Posh Nosh

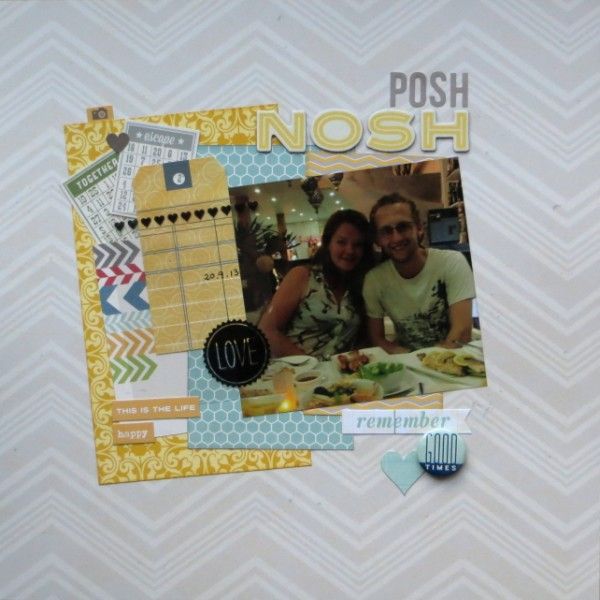
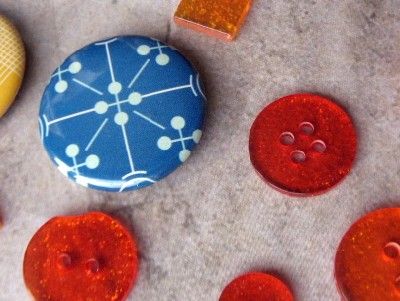
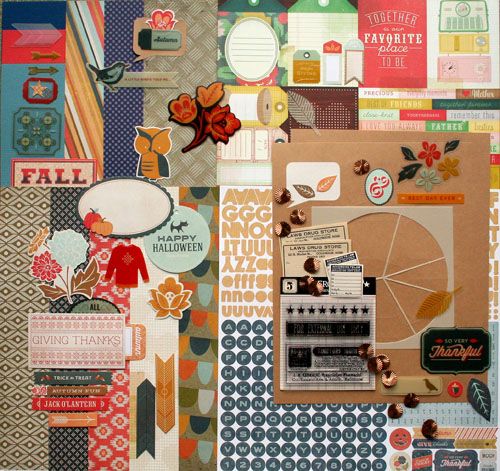
I think I managed most of the instructions: a single, cropped, photo from No.1 Son's recent holiday in Thailand, using muted papers and mixed-collection embellishments from my November Counterfeit Kit along with a scrap of girly (?), swirly patterned paper.  The title is made from two different alphabets but I have yet to add the journalling because No.1 Son can't remember the name of the restaurant they ate in ... I shall have to call his girlfriend and find out.  To be honest, I forgot about the edge distressing and struggled with the angled clustering, but I really like the use of a neutral patterned sheet as a background and will definitely be trying that again.

Now all that remains is to guess just whose style I have counterfeited ... I was torn between Lynette, Milissa and Stephanie because most of the other Forgers love getting messy with inks ... but I have to choose one, so I'll plump for Milissa!

I wonder who Julene was swapped with ...and whether she had trouble adapting her style?

Tuesday 12 November 2013

Sofa Friends & Scrapfriends

Jimjams - layout detail - stitching and embellishment cluster
I have a number of sketch challenge sites in Feedly and usually grab a few sketches from around the web for inspiration before a crop.

I don't actually print them out - just re-sketch them onto a scrap of paper, indicating where the photo, title and journalling will be, along with any embellishment groups.  This more or less guarantees that my page strays from the original sketch, especially if I can't refer back to it before finishing the page.

This month I popped over to Scrapfriends and grabbed their November sketch (#19), my November Counterfeit Kit and a festive photo: our three kids and their cousins have been snapped on our sofa almost every Christmas for the last 17 years ... it's getting harder to gather them all together thanks to jobs/studies/travels and it is definitely harder to squeeze them onto it. 
{It won't happen this year either as we are facing our very first Christmas without No.1 Son; my heart strings are being tugged hard each time I cut an apron string *sigh*}

Jimjams - layout - Xmas 2010

Scrapfriends - November sketchI remembered that there were some feathers hanging down on the sketch and chose to interpret them as hanging baubles because we use them to display our Christmas cards from them each year - see what I mean about deviating from the sketch LOL

There's a colour challenge over at Scrapfriends in a couple of days ... I wonder how far I'll wander from that ;-)

In the meantime they also have a great blog candy giveaway at the moment ... take a look here for details.

Giveaway @ Scrapfriends

P.S. See my title figures there ... they were plain grungeboard ... amazing what a little blue ink, a swirly stamp and some black Stazon can do - check out other ideas for changing colour over at the Counterfeit Kit Challenge Blog today!

Friday 8 November 2013

Blinging Up Buttons

Jimjams - Blinged Up Buttons
In this month's kits to counterfeit there were some lovely sparkly buttons in Jenni Bowlin's Artisan Add-On.  I had a packet of tiny glittery tiles but thought I'd try and add a little glitz to a few translucent orange buttons with sparkly embossing powder:
Coating the back of the buttons with Versamark ink, dipping them in embossing powder and heating them with my heat gun worked like a dream.
You could achieve the same effect with glitter glue but this was super quick to do - just let the melted embossing powder cool for a couple of minutes before touching the button.

Jimjams - Adding sparkle to buttons
Versamark Ink and Kaleidoscope Embossing Powder is a quick and easy way to add sparkle to clear buttons!
(I use an old chopping board covered in aluminium foil to protect my work surface)
I also had a go with some clear buttons and added my own colour with Sharpies - great results!  At first I tried colouring on the front of the button, but it actually worked better on the back - and it also worked perfectly well with coloured pigment inks rather than Versamark.  The embossing powder is slightly rough so it's better to use it on the back of the button or you risk scratching anything that the button rests against.

Jimjams - Coloured Buttons

You could even try adding a multi-colour design with your pens ... or an initial (just remember to use a mirror image if adding it to the back of the button!)

Friday 1 November 2013

Newvember Kit

Jimjams - Kit detail - Pink Paislee Portfolio die cuts
Hello and welcome to another month of kit counterfeiting with the Counterfeit kit Challenge Blog.  This month we are are joined by Vikki our guest designer for November who starts the counterfeiting ... and if you started at the beginning you will have hopped over to me from fellow Master Forger Dawn.

The kit(s)-to-copy are Jenni Bowlin's offerings for October and, if I'm totally honest, I wasn't blown away by them.  Not my style as I don't really do floral :-(

Jenni Bowlin - October 2013 Main Kit

Furthermore I was itching to use some new scrapbook supplies, having just celebrated a medium birthday (ending in a 5) by splurging for the first time this year!  So this month I decided to counterfeit with new stash using some of the original kit's colours and patterns as a starting point:

Starting with the 3 papers on the top row, I found an orange diagonal, a blue dot and a grey chevron from Simple Stories Urban Traveller's Basics Kit;  the next row of papers in the original were counterfeited with papers using a grey grid, blue hexagons, a red dotty (did I mention that I struggle with florals?), a cream ledger and multi-coloured circles, all from three 6x6 pads (Studio Calico Snippets and Simple Stories 24/Seven and Urban Traveller).

Jimjams - November 2013 Counterfeit Kit

I added a couple of other sheets from the pads to pad (!) out the papers and chose a selection of 3x4 cards from the Urban Traveller & 24/Seven collections.  A couple of alphas, a roll of washi, some acetates, flair buttons and die-cuts later my kit was nearly ready.

Jimjams - November 2013 Counterfeit Kit - reverse papers

I had a quick look at the embellies in the Jenni Bowlin add-on kits and loved the sparkly buttons in the Artisan Add-On ... and made my own!

Supplies:
Orange Stripes/Map, Navy Dots/Ledger & Chevron/Grey Concrete from Simple Stories Urban Traveller's Basics Kit
B side of Okay from Studio Calico Snippets
Today from Simple Stories 24/Seven
A side of Stop from Studio Calico Snippets
Notebook/Yellow Honeycomb from SS 24/Seven
Lets Go, Downtown & Goodtimes, Bingo Cards/Coloured Dots from SS Urban Traveller
3x4 Journalling Card Elements from SS Urban Traveller & 24/Seven
Jimjams - Counterfeited buttonsWebsters Pages Transparency Cards
Die Cuts from Pink Paislee's Portfolio Ephemera
WRMK Orange washi
American Crafts Flair Buttons
AC Meadow Thickers
SS Sn@p! Typeset, Letters & Icons stickers
Glittery tiles ... who knows where these came from?
Counterfeited Queen & Co Sparkle Buttons

I'm really excited to get started with my new goodies - I'll be back with details of button experiments in a few days.  In the meantime please hop over to Julene to see whether she's used old stash or new stash in her counterfeiting.

Monday 28 October 2013

Blurred Vision

I have managed to get photographing my layouts down to a fine art:
  • place them on the floor in a good light (by my patio doors)
  • stand over the page and zoom in slightly, squaring the shot with the viewfinder grid lines
  • edit the photo in Picasa (straighten, crop, adjust colour & contrast, retouch ...)
  • resize for the web with PixResizer
  • upload to my web storage
  • share on my blog/UKS gallery
However, just recently I've noticed a bit of fuzziness creeping in.  No matter how good the light, how still my hands, how clean the camera lens ... something is just not right.  And I *am* wearing my glasses.  Strangely, the macro shots are just fine!

Jimjams - Fuzzy page

My beloved Canon Powershot A700 is well used.  It has received a quite few knocks over the last seven years: there are two scratches on the lens that catch the sunlight sometimes; there's a chip in the housing near the battery compartment; most of the symbols on the back have worn away.  BUT, since its return from a month's sojourn in the rainforests of Costa Rica and the orphanages of Nicaragua, documenting Child No.3's summer expedition, it's struggling!

I finally made time to experiment and was amazed to find that the fuzzy area is only in one part of the photo.  Rotate the camera and the fuzzy area moves too!  I took a closer look at the camera:

Jimjams - Photo - Dented Canon Powershot A700

Hmmm - definitely an interesting shape to the lens housing.  And a new dent on the top corner by the flash.  That could explain a lot!

Staying on the subject of things that can blur the vision, here's a page made from my September Counterfeit Kit:

Jimjams - Layout - Alcohol Rules

Sweden has a state run chain of alcohol shops called Systembolaget which fascinated me when I worked there 30 years ago so I wanted Hubby to see one during our Scandinavian road trip.  In my day, you had to select each bottle of wine/beer/spirit from the current brochure, take your order to a counter and the assistant would fetch it from the storeroom for you.  Nowadays, once you have been allowed into the store by the security staff (over 20s only), you can fill your basket from the price-ordered shelves yourself, though there are still no multi-buy offers allowed. Better for the wallet that way to be honest!


You will notice that there is NO blurring of the layout photo.  Well that's because I treated myself to a replacement Canon.  As with computers, camera technology has moved on; so for much less money than my old A700, I have more than 3 times the zoom and twice the mega-pixels.  It helped that I was happy to settle for the SX240 HS which is the 2012 model and therefore ⅔ the price of this year's SX270 HS.  Just got to read the manual and work out what to do with all the other new features that have been introduced since 2006!  Happy Days :-D

Thursday 24 October 2013

Going Dutch

Jimjams - Layout detail - ribbon curl & bunting title
Welcome to the final post of the October CKCB Members' Blog Hop; if you didn't reach me from Bridget then you might want to start at the beginning here.

This month Challenge #1 asked us to take inspiration from  jewellery in some way.  I've never really scrapped about my jewellery.  I don't have a lot.  A burglary back in the early 90s cleared us out and made me reluctant to invest too much emotion in valuables.  One thing that the "bar stewards" didn't steal (because it was ON my person) was my gold wedding band.  Hubby has a matching one and it was safe on his finger too :-D

It's about time I scrapped the story behind them:

Jimjams - Layout - Going Dutch

We adopted the Dutch custom of wearing matching wedding bands on the "wrong" ring fingers during our engagement and tranferring the rings across to the "correct" hand on our wedding day.  I'd totally forgotten, but Hubby still remembered that the design we chose was called "sneeuwklokje" (snowdrop).  What a great memory for useless information he has!  Strange name for the pattern though, as to me it looks like a cicle of xxxxx around the edge.

Supplies are from my October Counterfeit Kit with the addition of some blue cardstock, brads and a little orange & gold organza ribbon. The page is 8.5"x11" to fit into my Book Of Me album and it started life as October's sketch over at Purple Pumpkin - thanks Samantha & Sandra - great inspiration as always! (Still time to join in - deadline October 31st)

If you've missed anyone on the CKCBMBH you can find the full list over on the Counterfeit Kit Challenge Blog - why not join in yourself next month?!

Monday 21 October 2013

Quick Grid Page

Jimjams - Layout detail - title & butterfly die-cuts Challenge #3 over at the CKCB this month was to use a grid.
I love grids.  I think I'm naturally a straight lines scrapper and have to occasionally force myself to angle things on the page.  Even then ... I sometimes use grids!

This page is the sixth, final and fastest one I made at my recent scrapping retreat.  Originally I'd been thinking of using these small photos on a double page spread about Skansen in Stockholm, but, in truth, I have enough shots for a triple or quadruple page ... so I decided to put the photos of buildings onto one dedicated page.

Jimjams - Layout - Living With The Land

A few strips of patterned paper from my October Counterfeit Kit and a little butterfly punching (!) later and it was ready. I may add a date and place but will probably just leave that to the journalling on one of the other pages from the day.

P.S. Since there's no journalling on the page - you may be interested to know that the buildings on stilts are from Swedish regions where they get a LOT of snow!

Friday 18 October 2013

Green City

Jimjams - layout detail - embellishment cluster 
It already seems like an age ago, especially now that the autumnal wintry weather has kicked in, so it was lovely to spend last weekend scrapping with my Scandinavian summer holiday photos.

I managed six pages which is seriously fast scrapping for me!  Some ladies managed 15+ in the same amount of time.  Perhaps they spent less time chatting/eating/drinking/ogling other people's supplies?  Perhaps they were better prepared beforehand?

For my retreat preparation I had printed out a selection of holiday snaps in various sizes and jotted down some page ideas for some of them.  I had also put together a couple of Counterfeit/page kits but somehow once I'd selected these two photos of contrasting verdigris sculptures, it was more appropriate to grab my scraps bag to make my layout:

Jimjams - Layout - Green City

Jimjams - layout detail - embellishment cluster The journalling reminds me that, despite being the capital of Denmark,  Copenhagen's self-contained centre was easy to walk around as  it was full of parks and cyclists, keeping the motorised traffic sparse and calm!

An added benefit of scrapping with friends (apart from the shared chocolate) is that if you need a certain something, someone will surely lend/give it to you.  While I was cutting my title with my Sizzix Go Go Boots dies, left out to share on the "tools" table at the weekend retreat, I had a chance to browse through a friend's copious die collection and found the perfect flower to add to my page!  Thanks Jayne :-)

The page is based on this month's sketch over at Sarah's Cards and coincidentally conforms to a monochromatic challenge over at The Studio - haven't played along there for a while!

Friday 11 October 2013

Going, Going, GONE!

I'm going to a retreat with friends from UKscrappers this weekend and it's going to be a lot of fun.  While I'm gone I thought I'd share the first page made with my October Counterfeit Kit with you:

Jimjams 8x8 Layout - Going, Going, GONE!

It's an 8x8 page to go into the album about our home and the changes we have made over the years.  This was a sad day for us because one of the trees we planted when we moved here has had to come down.  The neighbours were concerned about their fence, the branches that hung over their garden, the leaves that fell on their grass and the shade that dappled their grass.  We were concerned about staying on good terms with them (and the costs of repeatedly trimming the tree every few years) and decided enough was enough.

Jimjams - Layout detail - hand stitched, faux cut-out title

Twenty years to grow and twenty minutes to come down!  Now we can see that our neighbours have a very large tree, but at least it has short branches and is evergreen!

Have a good weekend :-)