A good while ago I was sent a free pot of
ThermoMorph to review - I had warned the folks there that I was busy and it would take a while - but it has taken even longer because once I started playing with it, ideas kept popping into my head and I wanted to play some more.
This is a photo heavy post, so if you're in a hurry, the quick review is "
ThemoMorph does what it says on the tin tub":
Very easy to use - just activate the plastic pellets in hot water, shape & leave to cool
Reusable thousands of times - when things go wrong, just reheat and try again, hopefully you'll get it right long before 1000 tries!
No tools required - fingers are enough ... but you get more fun with moulds, stamps, cutters, paints, inks etc
Super strong when set - actually this is directly proportional to how chunky your end product is (thin pieces can be bent, but solid shapes are ... solid)
Can be moulded, carved, painted, dyed etc. - though you will need tools for this!
Applications are endless - limited only by your imagination (and tools!)
It's available from
Amazon in 500g tubs at £19.49 (or $19.97 in the
USA) which is quite pricey but you get LOADS of pellets in the tub and there is practically no waste as offcuts can simply be melted again and re-used. However, for people that want to try before they buy, the folks at ThemorMorph might want to think about selling smaller sample packs - 50g (about 5 tbsp) in a ziplock bag is plenty to give people a taste of the product!
OK, on with the experimentation: First off I wanted to mend something! My Big Bite has had a broken foot since I nearly broke my own foot with it. Superglue can't cope with the weight of the Big Bite, so it wobbles limply (geddit?!) on my desk whenever the sticky taped repair begins to come undone. ThermoMorph to the rescue:
I put a teaspoon of pellets into a disposable cup with a small quantity of recently boiled water* and watched as the white plastic pellets went clear and clumped together before fishing them out with the end of the spoon.
*the instructions say 60° but I haven't a clue what temperature it was
The blob on the end of the spoon was squidgy and elastic and could be manipulated by hand ... but it's not like glue - it won't stick surfaces to each other - it needs to
hold surfaces together! I realised that I needed to remove the non-slip feet to give the ThemoMorph something to latch onto and help the two pieces grip the base of the Big Bite.
Meanwhile it was already cooling and beginning to solidify ... you don't get a huge window of opportunity to mould, shape, cut etc depending on how hot it is when you start moulding, shaping, cutting etc! So I popped it back into the hot water and put the cup into the microwave for 15 seconds to heat it up again. Attempt number two worked better but there wasn't quite enough ThermoMorph to cover the base. Luckily hot ThermoMorph sticks very well to warm ThermoMorph, so I dropped a pinch of pellets into hot water to melt before filling in the gaps. ThermoMorph turns back to milky white as it cools, gradually hardening and losing flexibility - I happily waited for this to happen, though a dunk in cold water would have speeded things up. NB: The thinner the final shape, the quicker the cooling (and the shorter the shaping time).
I slotted the (hopefully?) repaired foot back onto my Big Bite and left it to cool for a further 10 minutes or so ... before carefully taking the next photo:
Many of you will know that a Big Bite is a seriously heavy beast ... so this was proof that the join was solid (neither of my previous superglue/sticky tape repair attempts would have survived this test).
Good as new! Well apart from the fact that the front foot is no longer non-slip, but I'll settle for wobble-free over non-slip any day!
ETA: I've also constructed an entire Big Bite replacement foot for a friend with a similar problem - photo here.
So far, so practical, but I wanted to have some fun moulding, carving, painting, dyeing etc! This required tools! I gathered the essentials:
- a shallow heat-proof bowl (saves water, allows easy re-heating of cooling, half-finished work n progress)
- a kettle
- a teaspoon (for measuring granules, stirring them and fishing ThermoMorph out of the hot water)
- a non-stick work surface (I used a cheap non-stick oven sheet from Aldi to protect my craft mat)
- a pair of scissors (snipping molten ThermoMorph into smaller pieces is easier than dividing it by hand because it stretches like Mozzarella when warm)
and the usefuls:
- a microwave (for speedy reheating of the ThermoMorph in the water-filled shallow heat-proof bowl)
- a rolling pin (I don't own a brayer)
- a selection of rubber stamps
- a selection of embossing folders, cutting dies and a Big Shot
- a mould or two
- a selection of items to make moulds from
- a heatgun and heat-proof mat (for even speedier reheating without the need to put the ThermoMorph back into hot water)
The easy (and safe) way to melt ThermoMorph is to put a few pellets (and scrap offcuts if you have any) into a shallow heat-proof bowl and add boiled water. I used a glass bowl this time because I wanted to be able to reheat the water in the microwave and I've found that ThermoMorph seems to have an affinity for
certain types of plastic ... it did start "bonding" with my plastic spoon and I didn't want it to stick to a plastic bowl. To be fair I may have over-heated the Thermomorph (no thermometer, plus improvising with the microwave and the heat-gun) because it does seem to get stickier when very hot!
The pellets go clear when they melt ... starting to look like frogspawn before clumping together ... and after a minute or two you can fish the clear blob of melted pellets out of the water and knead it into a lump. It's like playing with candle wax: don't touch it until it's cool enough so that it won't burn your fingers. If it starts to cool before you are ready, you can pop it back into the water (and reheat if necessary with more boiled water or by using a microwave for 10-20 seconds), but bear in mind that a fat blob takes longer to melt than a thin sliver ... so don't make lumps of your left-overs at the end of a session, make slivers!
My first idea was to stamp into some ThermoMorph that I had rolled flat between two layers of my non-stick oven sheet. I chose rubber stamps because of my worry about the way it had stuck to my plastic spoon handle when fishing it out of the hot water; I wasn't sure what clear stamps are made of and I didn't want to risk any "bonding" with a precious clear stamp. This one's an ancient freebie from Craft Stamper and I'll be able to trim the edges with scissors and use it on an anniversary card.
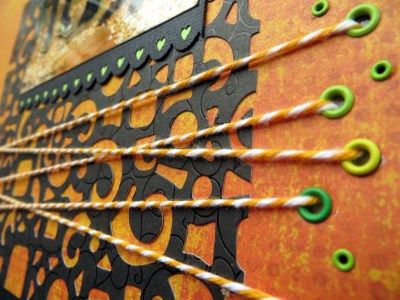
I also had a go with a thin Celtic knot border stamp and trimmed the edges neatly while the ThermoMorph was still pliable. I then popped it back into
warm water to allow me to bend it around my finger before trimming it to size. This is where my heat gun came in particularly handy, because I melted the very edge of one end and then held the two ends together until the joint had sealed. A little gold nail varnish later and I had a new gold ring!! I reckon some matching earrings would be easy too ... either by punching a hole for findings with my Big Bite or by making a hole with a hot needle.
Embossing and die-cutting was next, using my Big Shot and the multi-purpose platform. Rolling out a larger piece of melted ThermoMorph between layers of non-stick oven sheet takes a while and I had to re-warm the ThermoMorph a couple of times to roll it thin enough. I aimed for 2mm as I decided that the ThermoMorph should be thinner than the embossing folders.
The top piece of ThermoMorph was probably still a little too warm when I rolled it through the Big Shot because it oozed down the Cuttlebug Dominoes folder and out the other end. It's now about 1mm deep and I can read through it!! The Quickutz Dots and the Sizzix Budding Vine pieces were cooler but still pliable; they oozed less and remained about 2mm deep. A Sizzix Bigz die cut them beautifully, but thinner dies will not work. A thinner die may well mark the surface enough for you to cut the shape out by hand.
It's important to know the capabilities of your machine/embossing folders/dies ... if they look/sound like they are protesting because the ThermoMorph is too thick or too solid, then
STOP, re-warm it a little and try again.
Being a scrapbooker, I wondered if I could form "word" embellishments from extruded ThermoMorph and tried melting a few pellets inside a small syringe: a big
FAIL (it melted pretty well in hot water but cooled far too quickly in the nozzle once I started to depress the plunger) and a syringe in the bin because I couldn't be bothered to clean it out!
Next, I tried using a very cheap chocolate mould from Hobbycraft and failed again. Here the ThermoMorph was impossible to remove fully and seems almost to have split into layers on the surface. The bits that I managed to remove will re-melt and can be used for something else, but the leaf mould is out of commission!
Not to be defeated, I grabbed a Lakeland Plastics silicone Christmas mould and tried again ... with better results. Here the problem is that they are quite deep (for chocolates) and I want thin embellishments (for cards/layouts or decorations). I found that trial and error (snipping away some ThermoMorph from a shape that was too deep before reheating and remoulding) was necessary but the silicone moulds released really easily and the shapes could come out long before they were completely cool. The backs aren't neat (see the left-most star); they won't show on a card/layout but it might be worth sanding them down for tree decorations.
Not having many moulds to play with I wondered if I could make some of my own ... from ThermoMorph itself! As you can see I had quite some success making moulds by pressing various items into blobs of ThermoMorph and leaving them for at least 5 minutes to cool down before removing them.
It's important not to use very hot ThermoMorph
in these moulds in case it starts sticking to the mould (see the right hand flower which also had an air pocket). Let it cool quite a bit before pressing a small blob into each mould (No.1 Son suggests putting your home-made moulds into the fridge for a while to maintain a good temperature difference ... I'll try that next time).
Unfortunately these home-made moulds are completely inflexible (unlike silicone) and therefore they can't be used for very intricate shapes.
At this stage I was also experimenting with colouring ThermoMorph:
- the blue is made by adding a couple of drops Ranger Denim Alcohol Ink to molten ThermoMorph and kneading it. Glorious while still transparent, but dull once cool and quite messy for the fingers!
- the coppery colour is the result of adding some Avon bronzing powder to molten ThermoMorph before working it in by hand. Again, beautiful while it's hot, but the cold version still has a subtle sheen.
It's more useful to me to colour embellishments as I need them (and, thriftily, the off-cuts are all white and completely re-usable):
- the dark red is nail varnish applied to cold ThermoMorph shapes
- you've already seen the gold nail varnish on the ring, but it also worked well on the top and bottom buttons, bringing out the detail
- the tree is coloured with Stazon Ink
- Sharpies, Pro-markers and Ranger Alcohol Ink all give good coverage, but I'm not sure how permanent they are beyond a card/layout
Mary Anne has experimented with other ways of colouring and if you Google you'll find others have experimented with powder paint, glitter, powder food colouring etc (for molten ThermoMorph) and Sharpies, Pro-markers, paints etc (for solid ThermoMorph).
Finally, I had some random fun with it by adding pellets to boiled water and letting them to cool in situ ...
... and arranging some snipped offcuts (of the vine embossed scraps) on a heat-proof mat and melting them with my heat-gun before adding some tiny balls made from the copper-coloured scraps.
NB: It's easy to melt the pellets with a heat-gun BUT easy to over-heat them: super-heated ThermoMorph is very,
very sticky and difficult to manipulate with tools; it's not safe to touch with fingers either!
That last experiment reminded me of playing with Friendly Plastic ... which makes me think of a few more ways to play and wonder how ThermoMorph would combine with FP? See what I mean about more and more ideas popping up in my head!
Still with me? What a mega-post! So the bottom line: would I recommend
ThermoMorph?
YES - it's useful; I've already mended my Big Shot foot and I'm sure that there are plenty of other opportunities to mend or hack things around the house
YES - it's fun; as you can see there are loads of ways to play and I keep thinking of more
YES - it's fast; from boiling a kettle to cutting a shape takes no more than 10 minutes (no waiting for Fimo or air-drying clay to harden)
YES - it's economical; off-cuts get re-melted and re-used, failures get re-melted and re-used
Are there any down-sides?
YES - it's fairly messy to colour before it's set and quite difficult to colour a large quantity evenly.
YES - it's got to be shaped quickly; you haven't got a lot of time to dither, but there's nothing to stop you re-vitalising your ThermoMorph a little in warm water before continuing, just don't let it get too cool or you'll have to start again!
YES - melting a large quantity of ThermoMorph will drain the heat out of boiled water in no time (you'd need to have it in a pan on the hob) ... the upside being that a large blob of melted ThermoMorph will retain its heat and remain pliable for longer ... the down-side is that this isn't so child-friendly! But it's not for kids, it's for ME!!!
ThermoMorph is Available from
Amazon in a mega 500g tub (club together with a friend or four because you don't need a lot of it to have some serious fun!)
Disclaimer: I received my tub of ThermoMorph for free, but the review is un-paid and the opinions are my own.
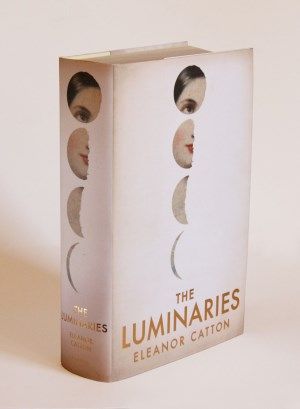 The first was 2013 Man Booker prize-winner "The Luminaries" by Eleanor Catton. I've diverted from my normal front cover images because this was a beast of a hardback to hold ... all 832 pages of it! Set in the 1860s New Zealand gold-rush, it's a Victorian-style novel, full of wordy descriptions and lengthy character developments, where the action unfolds quite slowly but gathers pace once you have been introduced to the twelve main characters, an unexpected interloper and the unsolved crimes that concern them. Unfortunately that takes over half the book ... which is constructed around astrological charts with twelve "chapters", each half the length of the previous one. Not an easy read, but a cleverly constructed puzzle book which I would quite like to have another go at now that I know what's what (just not for a while).